How to Host a Cookie Exchange Party: A Complete Planning Guide
A cookie exchange is one of the easiest holiday parties to host. Here's how to plan the guest list, quantities, invitations, and setup for a stress-free swap.
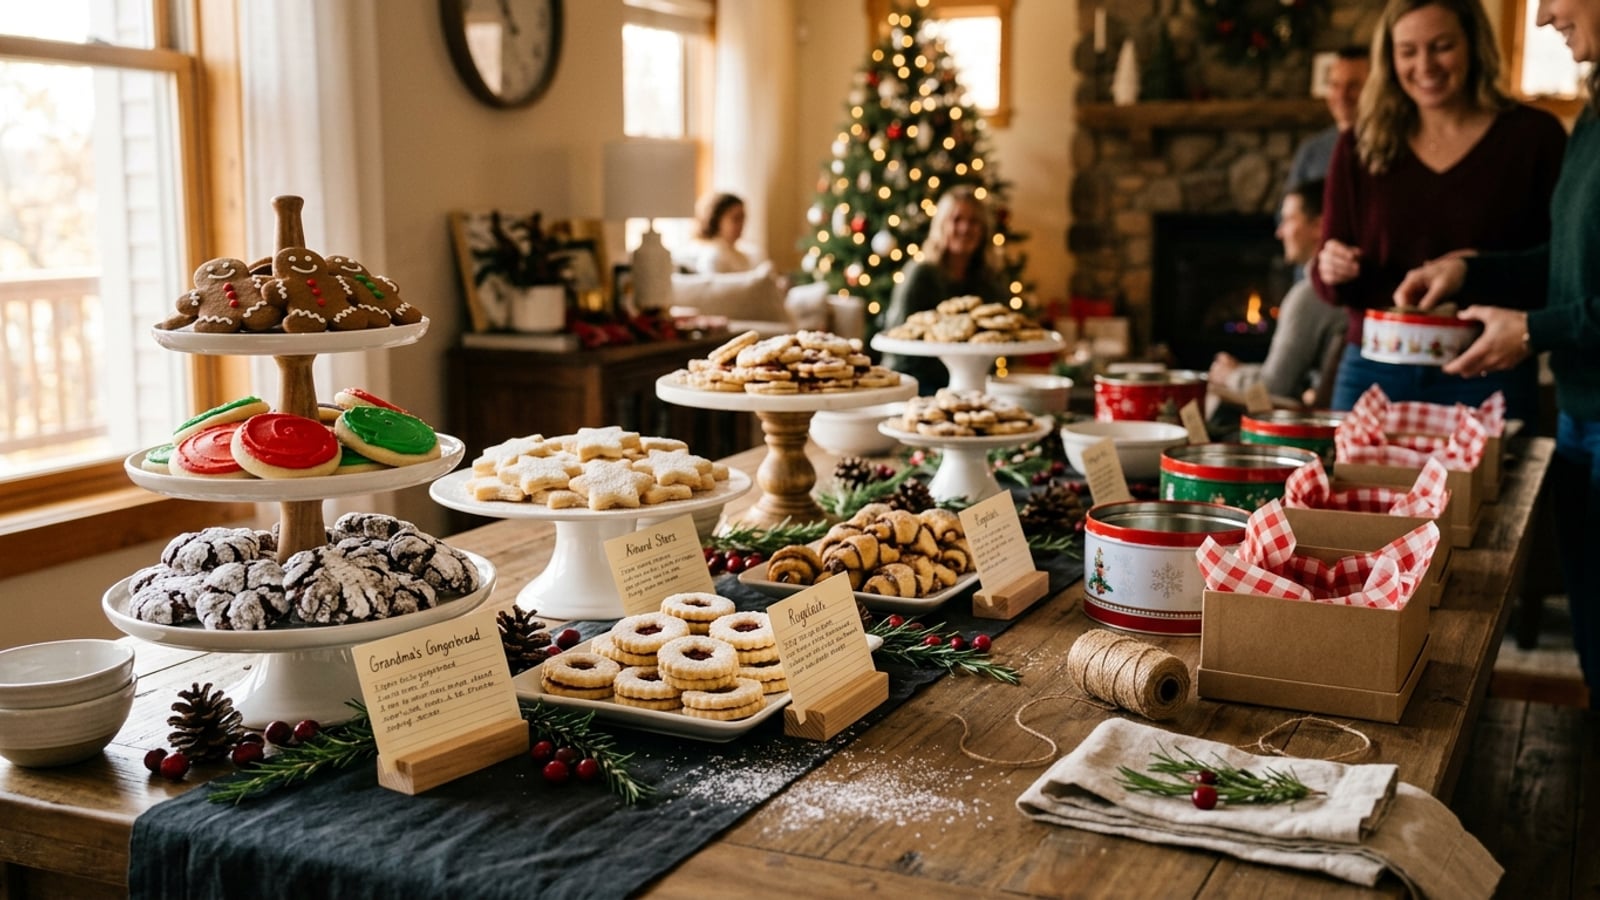
A cookie exchange is one of those rare holiday parties that practically plans itself. Guests bake one large batch of their best cookie, bring it to a gathering, and leave with a full assortment of everyone else's recipes. You end up with a dozen varieties of holiday cookies without baking twelve different kinds yourself. If you have been thinking about hosting one, here is everything you need to pull it off.
What Is a Cookie Exchange?
A cookie exchange — sometimes called a cookie swap — is a party where each guest bakes one type of cookie and brings enough to share with every other attendee. At the party, everyone samples the cookies, then boxes up an assortment to take home. The host provides the space, refreshments, and containers; the guests provide the cookies. It is a simple concept that scales beautifully from a small gathering of close friends to a neighborhood or office tradition.
How Many Guests to Invite
Six to twelve guests is the sweet spot for a cookie exchange. Fewer than six and the variety feels limited; more than twelve and the math on quantities gets unwieldy and the event can feel crowded. Think about your table and counter space — you will need room to display one platter or tray per cookie type — and work from there.
A smaller group of six to eight works especially well for a first exchange. It keeps the logistics simple and gives you a chance to dial in the format before scaling up in future years.
The Cookie Math
The standard formula: each guest brings one dozen cookies per guest attending. If you have ten guests, each person bakes ten dozen cookies — ninety going out, ninety coming home, everyone leaving with a full dozen of each variety.
If that sounds like a lot of baking, scale back: ask each guest to bring half a dozen per person, and guests leave with half-dozen assortments instead. Both approaches work. The key is communicating the quantity clearly in your invitation so no one shows up with two dozen cookies when everyone else brought ten.
Invitations and Timing
Send invitations six to eight weeks before the party. The holiday season books up fast, and your guests need time to choose a recipe, gather ingredients, and schedule their baking. A mid-December party deserves an invitation by late October at the latest.
Your invitation needs to do more than announce the date — it needs to explain the rules. Include:
- The date, time, and location
- The exact number of cookies to bring (e.g., "please bring 8 dozen of one type")
- Whether cookies must be homemade
- Whether to bring the recipe to share (highly recommended)
- What to bring the cookies in (or let them know you will provide containers)
- An RSVP deadline and how to respond
Ask guests to RSVP with the cookie they plan to bring. This lets you prevent duplicates — nobody wants three different people showing up with snickerdoodles. When you collect RSVPs, keep a running list and gently redirect anyone who picks a type already claimed. A dedicated RSVP page makes this easy: guests can confirm their attendance and note their cookie in one step. Create your cookie exchange RSVP page so every response lands in one place instead of scattered across texts and email threads.
For invitation wording inspiration, see our Christmas party invitation wording guide — many of those examples adapt easily for a cookie exchange.
Choosing the Right Cookies
Not every cookie is a good exchange cookie. The best choices:
- Hold up well at room temperature for at least two to three days
- Pack without crumbling or sticking together
- Look distinctive on a display platter so guests can tell them apart
- Do not require refrigeration
Classics that always work well: frosted sugar cookies, chocolate crinkle cookies, peanut butter blossoms, shortbread, thumbprint cookies, and snickerdoodles. Delicate cookies — tuiles, lace cookies, anything with a fresh cream filling — are risky for transport and packaging. Steer guests toward sturdier options in your invitation.
Setting Up the Display
The display table is the centerpiece of the party. Set out one tray, plate, or tiered stand per cookie type, arranged so guests can walk around and view everything. A simple handwritten label card next to each tray — the cookie name and the baker's name — adds a personal touch and helps people remember whose recipe they loved.
Gather takeaway containers ahead of time: bakery boxes, festive tins, cellophane bags, or kraft boxes lined with tissue paper all work. If you ask guests to bring their own containers, say so clearly in the invitation. If you are providing them, stock one per person plus a few extras.
Beyond the cookies themselves, keep refreshments light: mulled cider, hot chocolate, coffee, and tea fit the cozy holiday mood without competing with the main event. A cheese board or simple savory snacks give guests something to nibble between tastings.
Recipe Cards: A Small Detail That Makes a Big Difference
Ask each guest to bring printed recipe cards — one per attendee. Guests love going home not just with the cookies but with the recipe. If some guests prefer not to share their recipes, that is fine; just do not make it mandatory. A simple index card or a printed half-sheet works perfectly. Some hosts collect the recipes beforehand and create a printed booklet to hand out at the party — a nice keepsake if you have the time.
Allergies and Dietary Restrictions
Holiday baking is full of common allergens: nuts, dairy, gluten, and eggs appear in nearly every traditional cookie recipe. When guests RSVP, ask if anyone in their household has a dietary restriction or allergy. Share that information with the group ahead of time so bakers can plan accordingly — or at minimum label their cookies with major allergens at the display.
Read our full guide on handling dietary restrictions at a party for more on how to manage this gracefully without making it the focus of your event.
Fun Activities to Add
Cookie exchanges are social by nature, but a light activity keeps energy high and gives guests something to talk about beyond the cookies themselves. A few easy options:
- Cookie superlatives. Have guests vote on categories: best decorated, most creative flavor, most likely to be eaten first, most impressive technique. Award the winners a small prize or bragging rights.
- Blind tasting. Cover the labels on two or three cookies and have guests guess the flavor before revealing what they are.
- Recipe swap add-on. Ask everyone to bring a second recipe — not necessarily a cookie — for a general holiday recipe exchange alongside the cookies.
Baking and Timing Tips for Guests
Include these tips in your invitation or a follow-up message to guests:
- Most cookies stay fresh for two to three days at room temperature; plan your bake date accordingly.
- Cookies freeze beautifully if baked in advance — bake up to two weeks ahead and thaw at room temperature the morning of the party.
- Bring cookies in a single layer or separated by parchment to keep them from sticking or breaking in transit.
Start Your RSVP Page Today
The hardest part of hosting a cookie exchange is coordinating who is coming and what they are bringing. A dedicated RSVP page solves both at once: guests confirm attendance, note their cookie type, and you see every response in one dashboard. No chasing texts. No keeping a separate spreadsheet.
See how other hosts set up their Christmas party RSVP page for inspiration, then create yours in minutes. Send the link in your invitation and let the responses roll in while you focus on finding the perfect cookie recipe.
For tips on timing — when to send your invitation and how far in advance to set the RSVP deadline — see our guide on when to send party invitations.
Ready to create your event RSVP?
Build a beautiful event page in minutes. Share one link. Track every response in real time.
Create Your Free RSVP Link