
How to Host a Pumpkin Carving Party: A Complete Planning Guide
Everything you need to host a pumpkin carving party — from timing and supplies to food, activities, and getting RSVPs in one place.
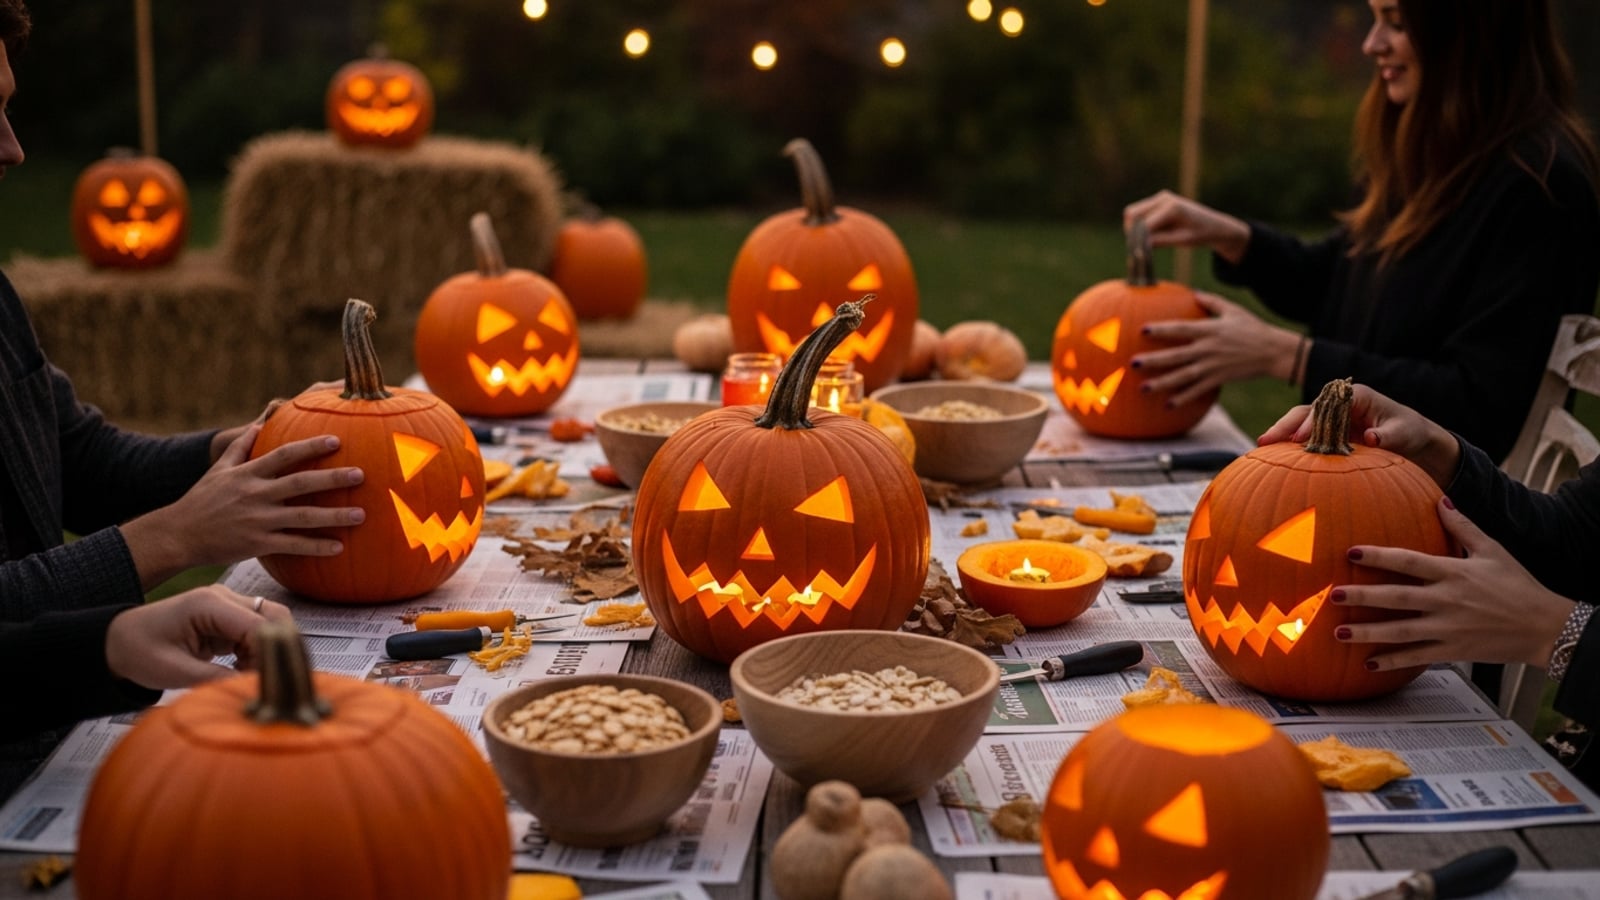
A pumpkin carving party is one of the easiest fall gatherings to pull off. The activity is built in, the decor takes care of itself, and guests leave with something to display on their porch. The challenge is the logistics: pumpkin guts everywhere, tools shared across a crowd, and food that needs to stay far from the mess. Here is how to run it smoothly.
When to Schedule Your Party
Aim for one to two weeks before Halloween. Carve too early and the jack-o'-lanterns will rot before October 31st; carve on Halloween itself and nobody can attend. The Saturday or Sunday that falls closest to October 25th hits the sweet spot — pumpkins carved that day will hold up through Halloween night.
Plan for about three hours total. The first thirty minutes are for arriving, grabbing a drink, and claiming a pumpkin. The next ninety minutes to two hours are prime carving time. The final stretch is for cleanup, a contest reveal if you are running one, and lingering over food.
Pumpkins: Provide Them or Ask Guests to Bring Their Own?
Both approaches work. Asking guests to bring their own pumpkin keeps your costs down and lets everyone pick the size and shape they want. If you go this route, say so clearly on the invitation and remind guests a day or two before the party. Always have two or three extra pumpkins on hand for people who forget.
Providing pumpkins yourself works well for smaller groups or parties with kids where you want to control pumpkin size. Choose ones with a hard rind, thick walls, and a flat, stable base — they are easier to carve and stay upright on the table. Avoid very large pumpkins unless you want guests stuck scooping for an hour.
One practical note: people will be taking their finished jack-o'-lanterns home. Remind guests to bring a bag or box in the car, or have paper grocery bags available at the end of the night.
What to Set Up Before Guests Arrive
The single most important setup decision is table coverage. Pumpkin carving produces a surprising amount of mess — stringy pulp, seeds, and watery liquid. Cover every carving surface with newspaper, butcher paper, or cheap disposable plastic tablecloths before anyone sits down. Disposable tablecloths from a dollar store cost under a dollar each and make cleanup trivial: when carving ends, fold everything up and take it to the trash.
Set up a designated seed station: a separate bowl or small bucket where everyone deposits their seeds as they scoop. You can roast these during the party — rinse them, toss with olive oil and salt, and bake at 350°F for 15–20 minutes — and have them ready as a snack by the time carving winds down. Guests appreciate the bonus treat.
Put a trash bag within arm's reach of every two or three seats. The easier you make cleanup as-you-go, the less chaos you face at the end.
Tools and Supplies Checklist
- Pumpkin carving kits — the small serrated saws and scooping tools from these kits outperform kitchen knives. You do not need one per person; two or three kits shared across a table of six works fine.
- Permanent markers — Sharpies let guests sketch their design on the pumpkin before committing to a cut. Essential.
- Large metal spoons — for scooping out the inside quickly. Supplement the plastic tools that come in most kits.
- Printed carving templates — download a few classic and creative designs and print extras. Tape them to the pumpkin surface with tape or pins, then transfer the pattern with a pick.
- Tea lights or LED candles — to light finished pumpkins at the end of the night. LED versions are safer if kids are involved.
- Paper towels, rags, and hand wipes — in abundance. People will want clean hands the moment they reach for a drink.
- Extra garbage bags — one per table, minimum.
Food and Drinks That Work at a Carving Party
Keep the menu simple and hands-off. You will have pumpkin guts on your hands and won't want to be in and out of the kitchen. The best carving party food can be made ahead and served warm without attention:
- Chili or soup — set up a pot before guests arrive and let it stay warm on the stove. Guests can serve themselves during breaks.
- Hot apple cider — spiked for adults, plain for kids. Warm, seasonal, and hands-free once it is brewing.
- Popcorn, pretzels, and candy — easy snacking that doesn't require utensils.
- Roasted pumpkin seeds — the zero-waste bonus from the party itself (see above).
Set the food table away from the carving area. Nobody wants pumpkin pulp near their chili bowl, and separating the two zones encourages a natural midpoint break where guests step back, eat, and socialize before finishing their pumpkins.
Running a Carving Contest
A friendly competition adds energy and gives guests a goal. Announce the categories at the start so people can plan their designs. Good categories that work for mixed crowds:
- Best Traditional Jack-o'-Lantern
- Most Creative Design
- Funniest Pumpkin
- Best Pop Culture Reference
Small prizes — a bag of Halloween candy, a scented candle, a bottle of wine — make it feel official without adding pressure. Line up finished pumpkins side by side with tea lights inside and let guests vote by anonymous ballot.
Kids at the Party
Carving knives and young children are not a good combination. For kids under eight or nine, set up a separate station with pumpkin painting supplies — acrylic paint, foam brushes, markers, and stickers. Painted pumpkins look great and last longer than carved ones. Older kids can carve with supervision and a simplified template. If your crowd is mostly adults with a few kids in the mix, this two-station setup keeps everyone engaged without anyone feeling left out.
Invitations and RSVPs
Send invitations two to three weeks before the party. For a carving party specifically, you need a real headcount: each seat needs a pumpkin and tools. A rough guess does not work. Set your RSVP deadline one week before the party — that gives you enough time to buy pumpkins and supplies once you know how many people are coming.
The invitation should spell out whether guests need to bring their own pumpkin. A line like "Bring a medium pumpkin to carve — we'll supply all the tools, food, and cider" sets expectations clearly and prevents confused guests showing up empty-handed. See our Halloween party invitation wording guide for ready-to-use phrasing.
For timing guidance on invitations in general, the complete invitation timing guide covers every event type and lead time.
The easiest way to collect RSVPs and track who is coming is a dedicated RSVP link. Create a free RSVP page for your pumpkin carving party, share the link with your guest list, and watch responses come in without a single text chain to manage. You can see a live example of a Halloween party RSVP page to get a feel for how it works.
Once you have your headcount confirmed, the rest falls into place: the right number of pumpkins, enough carving kits, and a food spread that matches your crowd. The activity handles itself from there — all you have to do is keep the cider warm and the trash bags flowing. For more Halloween planning ideas, see the full Halloween party planning guide.
Ready to create your event RSVP?
Build a beautiful event page in minutes. Share one link. Track every response in real time.
Create Your Free RSVP Link